How-to Lesson 5
Set up your inventory
About this lesson
- What you'll do
- Add the supplies and equipment you keep in storage, with their prices and how many you have, so checkouts can find them by barcode or name. Add them one at a time, or import a whole list from a spreadsheet.
- How long it takes
- About 5 minutes, plus a minute or so for each item you add by hand.
- You need
- A laptop or phone, signed in as the team's owner. To import, a spreadsheet saved as a CSV file.
-
Step 1 of 8
Open Inventory
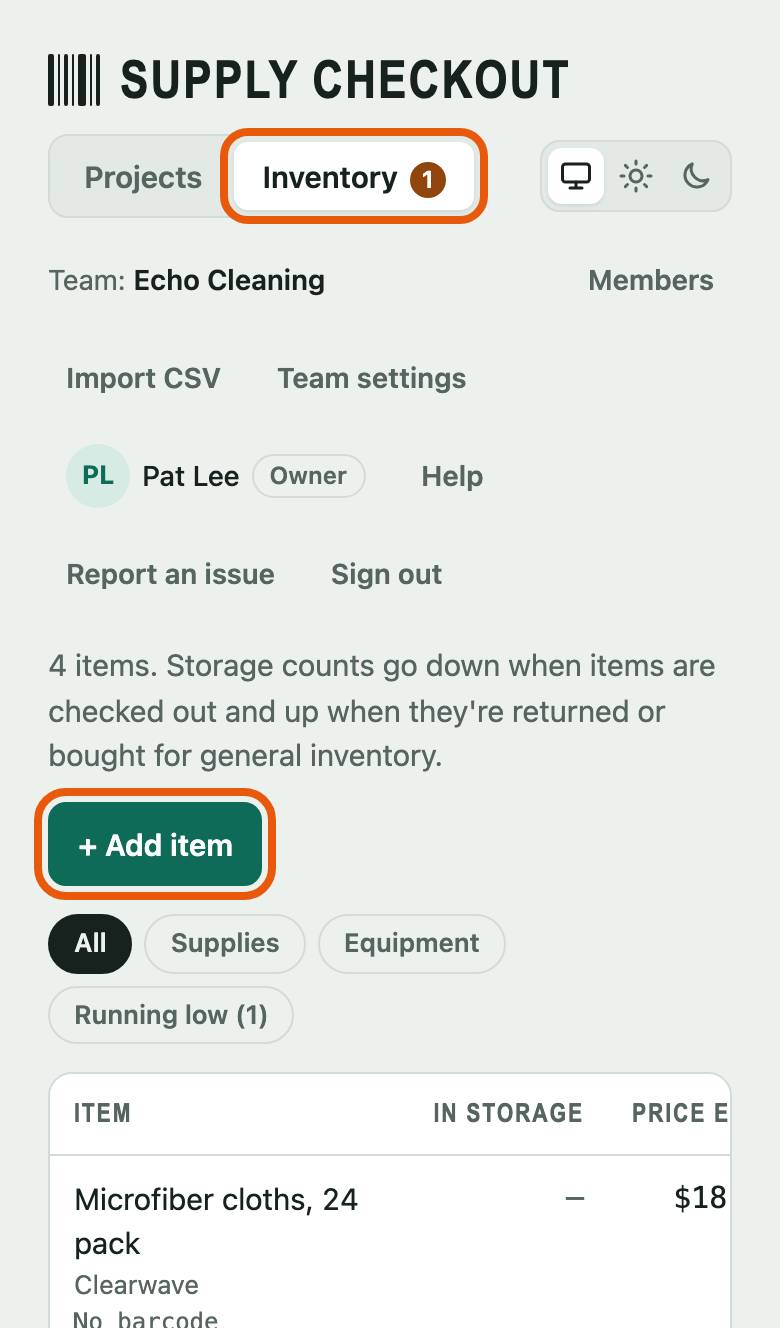
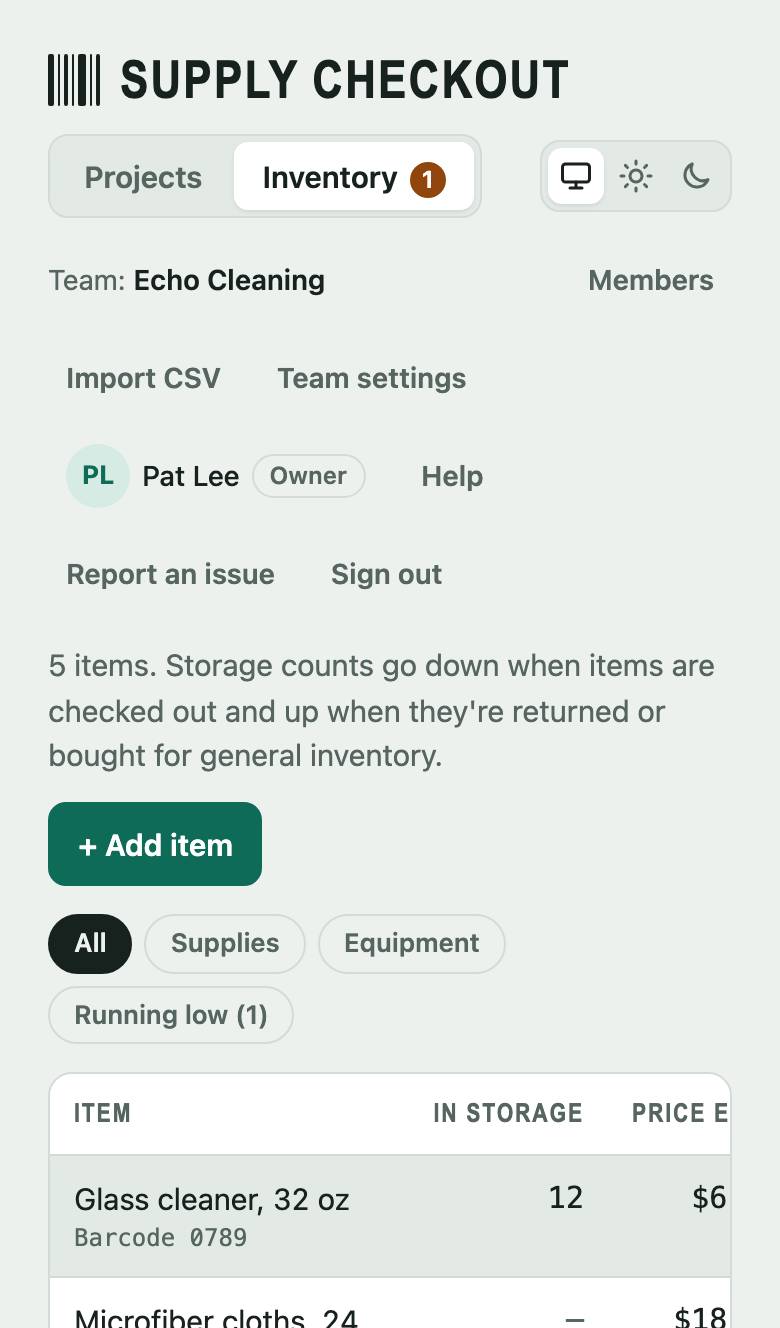
Tap Inventory at the top. It lists every item, how many are in storage, and its price. Tap + Add item.
-
Step 2 of 8
Scan the barcode and name it
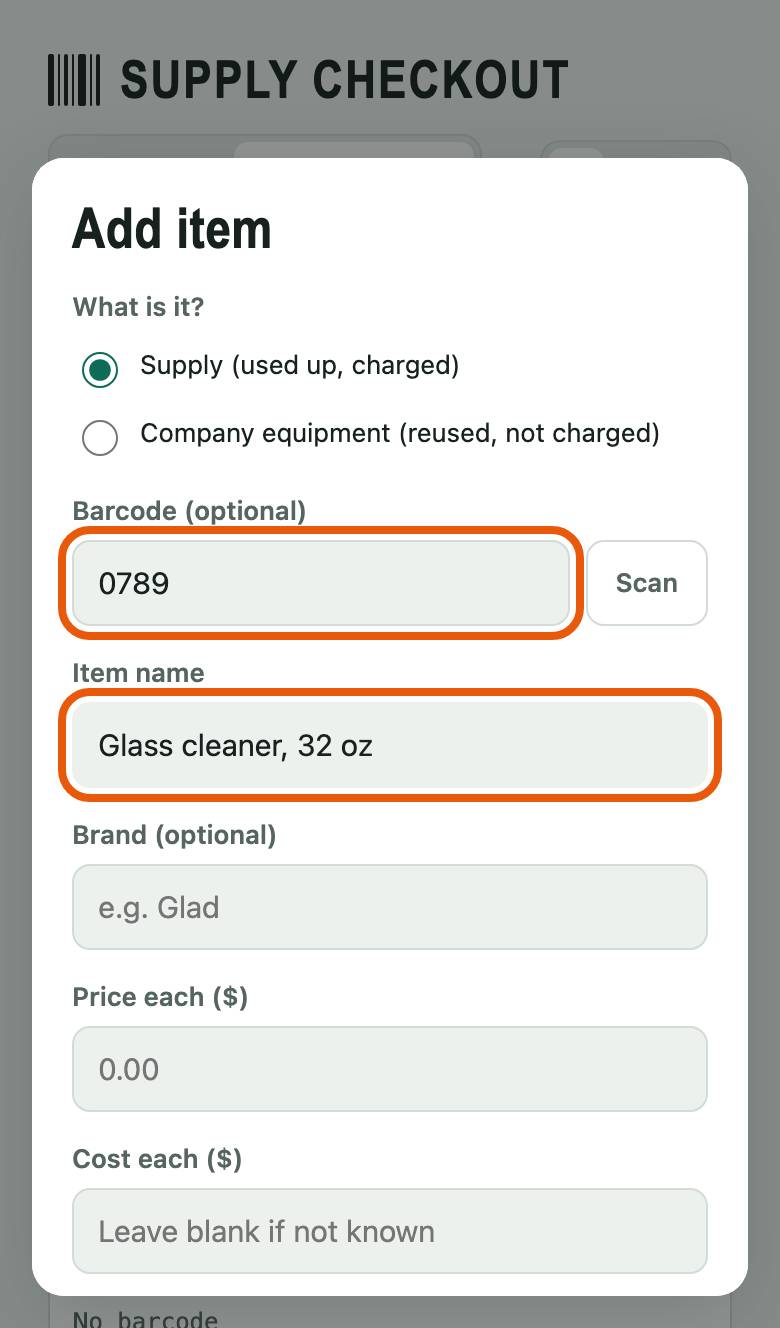
Scan or type the barcode in Type, scan, or leave blank. No barcode? Leave it blank: you'll find it by name when you check it out. Type its name in Item name.
-
Step 3 of 8
Add its price and how many you have
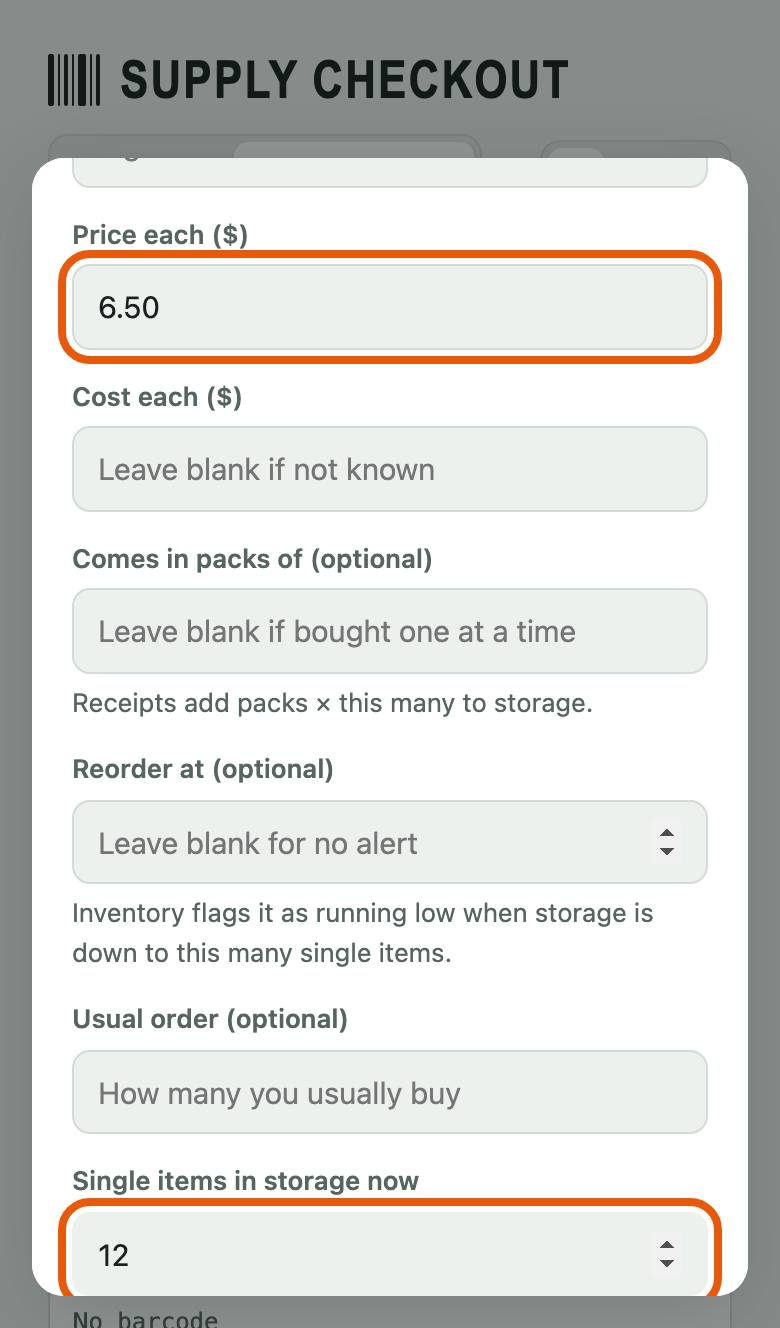
Type what a client pays for one in Price each ($) and how many are in storage in Single items in storage now. Then tap Save at the bottom of the form.
-
Step 4 of 8
It's in the list
The new item is in Inventory with its storage count. To change it or delete it later, tap its row.
-
Step 5 of 8
See what's running low
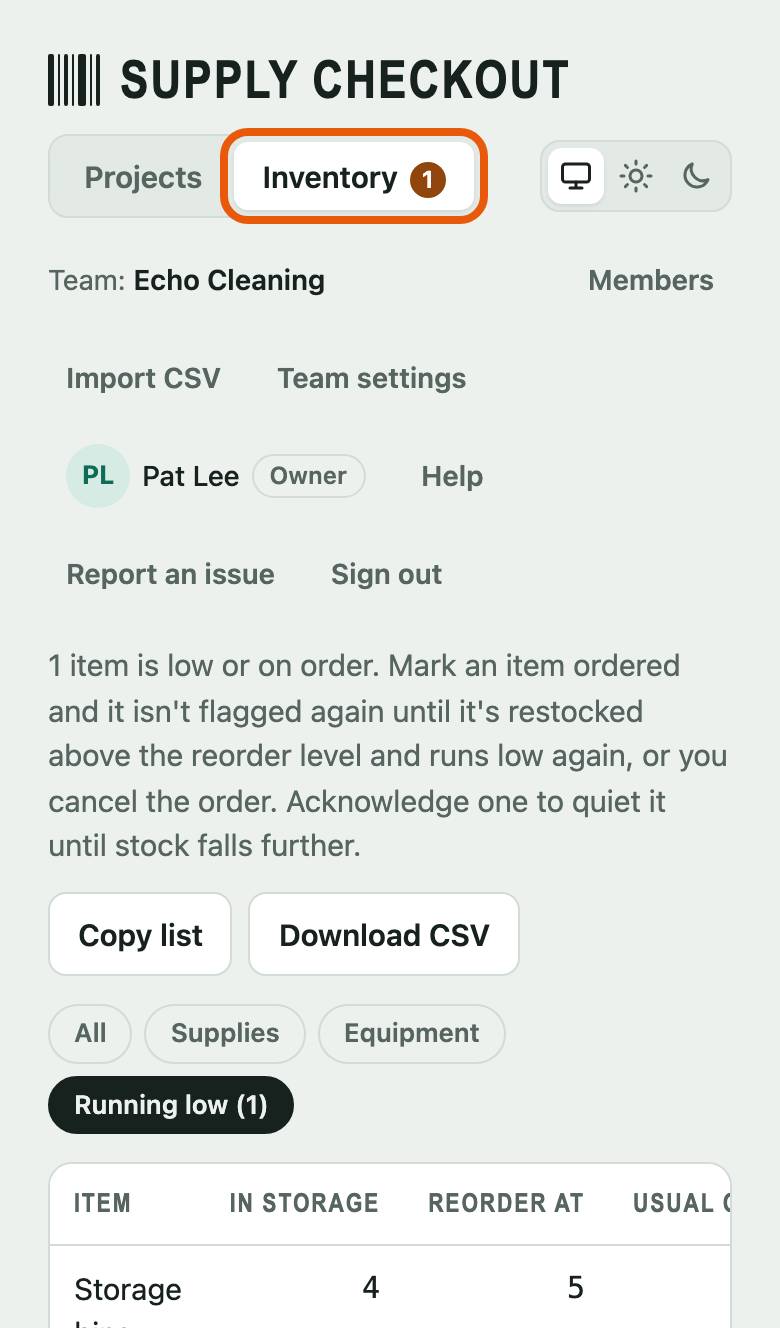
Tap Running low to see the items that are down to their reorder level. To be warned about an item, open it and set Reorder at.
-
Step 6 of 8
Already have a list? Import it
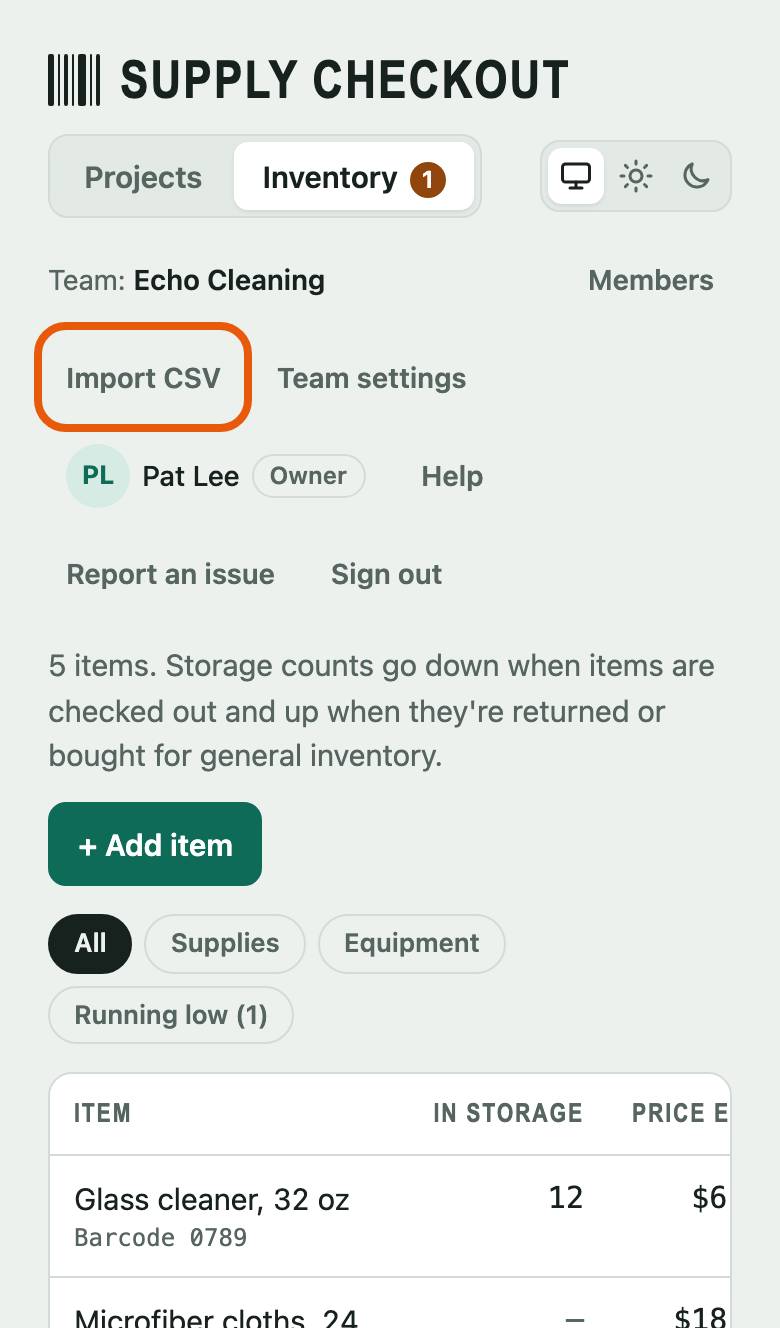
If you keep your supplies in a spreadsheet, import them all at once. In the bar under the header, tap Import CSV. Only the team's owners see it.
-
Step 7 of 8
Pick your file
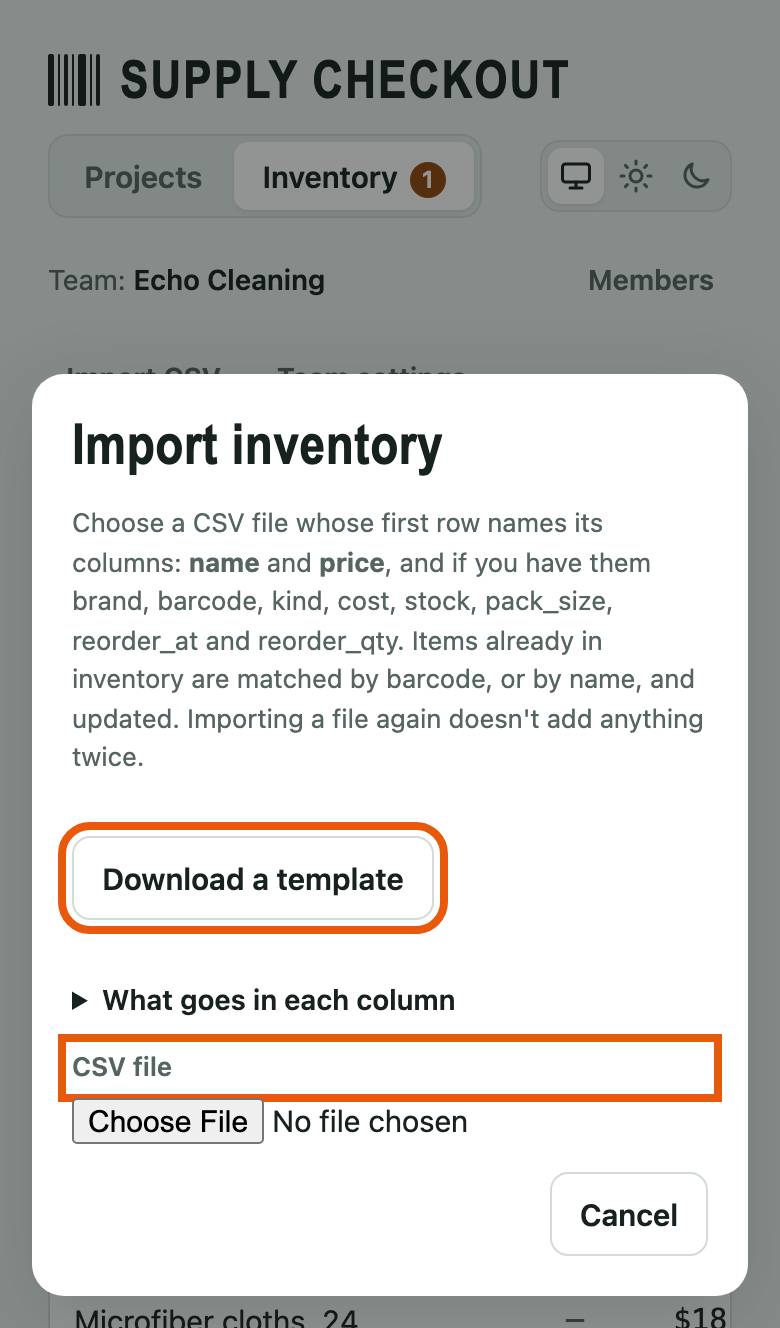
Save your spreadsheet as a CSV file, with a name, barcode, price and storage count for each item. Not sure what columns to use? Tap Download a template and fill it in. Then pick the file in CSV file.
-
Step 8 of 8
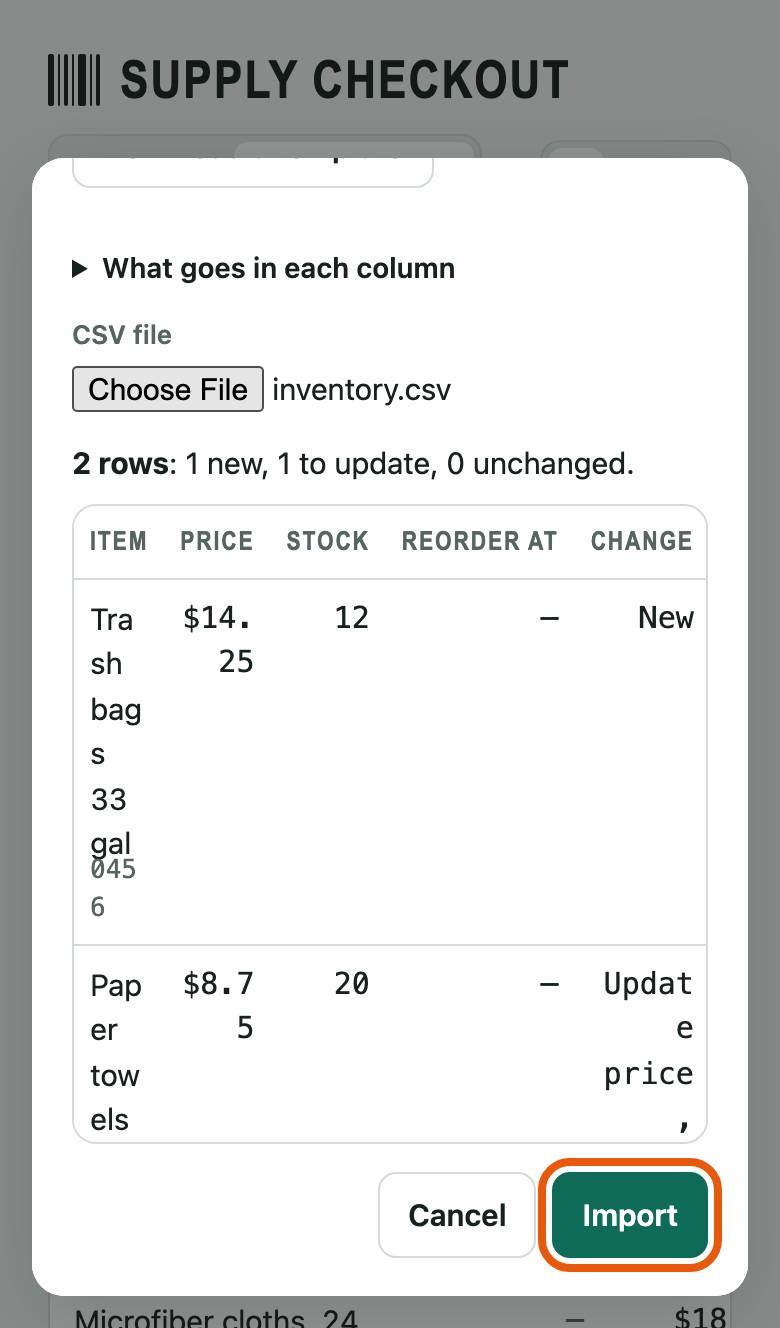
Check the preview, then import
Nothing is saved yet: the preview shows each row as new, an update to an item you have, or no change, and any row with a problem. When it looks right, tap Import.